Hi folks, this is Siobhan providing another update on my research. You may have heard about the dangers of public WiFi. When you use one, your wireless data is really available for anyone to collect and inspect. Thus the need to encrypt that traffic! utilization on free, no-password-needed, endpoints. This blog demonstrates how easy it is to use a packet sniffer to collect wireless traffic. If you have a Mac laptop, you can read this blog and be collecting wireless network traffic in under five minutes.
How to Collect the Wireless Traffic with macOS
I used the Apple wifi sniffer. This is a built-in tool provided in macOS. It allows for wifi diagnosis. There are a variety of different channels that you are able to scan to get in-site into what IP addresses are accessing particular networks. A packet sniffer can record network packets. These encrypted packets contain information about which websites a user visits, what is viewed on the site, the contents and destination of emails, and the details about any downloaded files, etc. Any connections you make to wifi offer up these packets to anyone to freely collect. That’s why the encryption aspect plays a vital role. It ensures if someone does collect – that it is very difficult to dine this content.
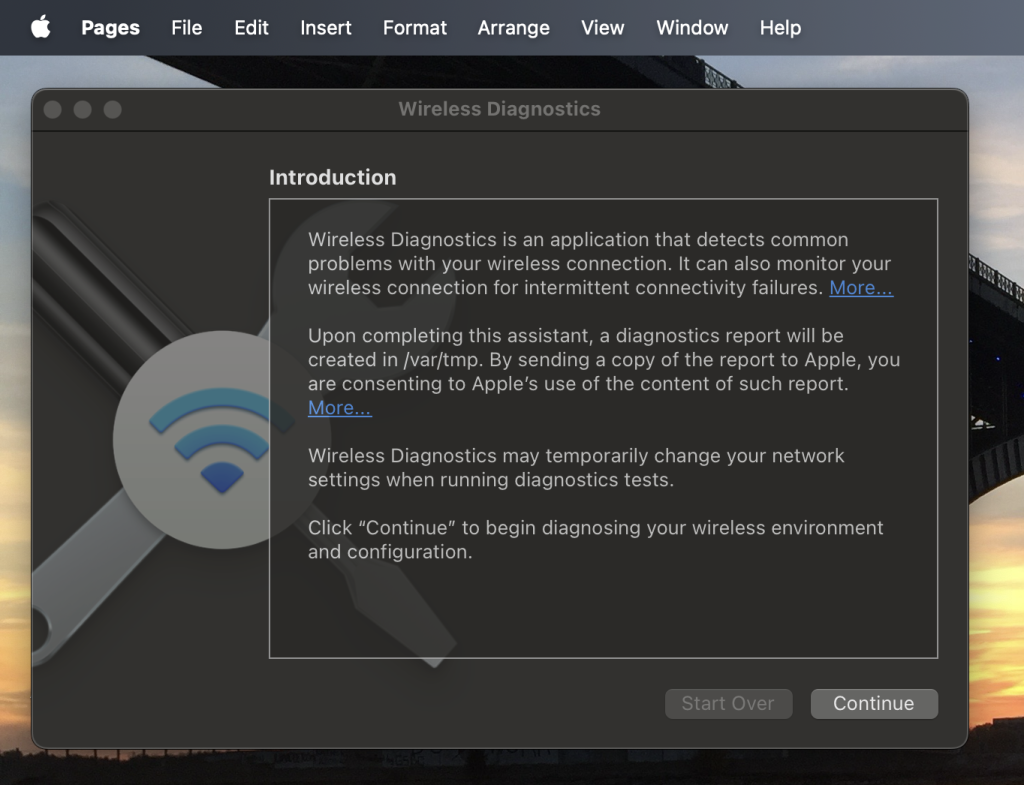
To access the wifi sniffer you need navigate to Applications > Utilities > Wireless Diagnostics. You can also search for it using Spotlight (Cmd + Space) and typing “Wireless Diagnostics.” Open the wireless diagnostics application but do not click anything. See the image below
Then navigate to Window and select Sniffer. You are almost ready to start collecting.
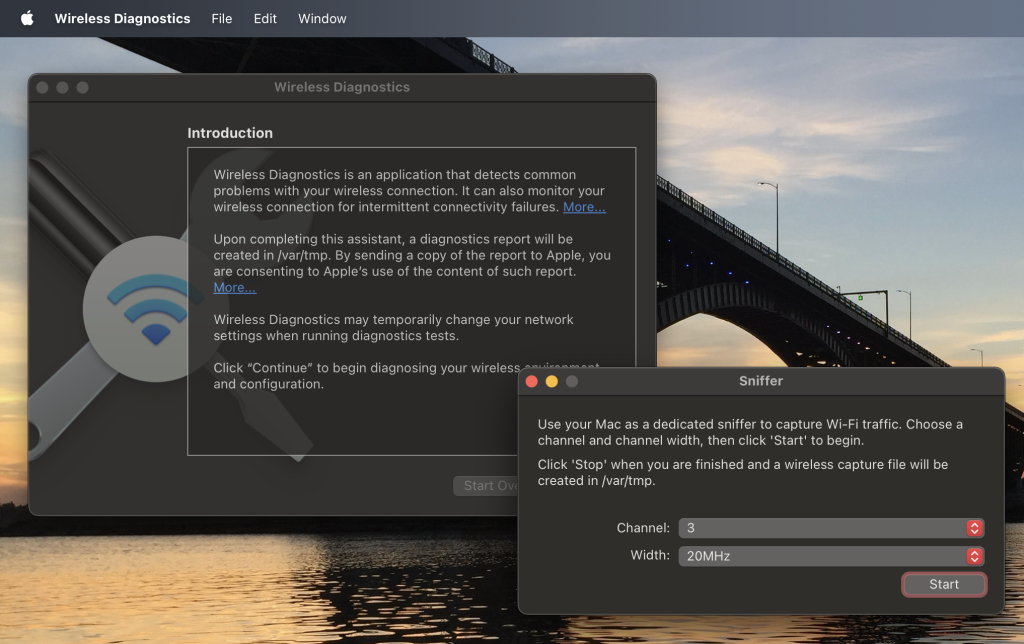
You will need to enter your devices password to be able to use this function. This will open the window that allows for you to select what channels you would like to scan. The channels that I found most helpful to scan are Channels 1, 6, and 11. What are channels? Wi-Fi channels are specific frequency ranges within the 2.4 GHz and 5 GHz radio bands that wireless routers and access points use to transmit data. These channels allow multiple devices to communicate wirelessly without interference.
Here’s a breakdown – details kindly provided by Bing Chat:
- 2.4 GHz Channels:
- The 2.4 GHz band has 11 overlapping channels (in most regions).
- Each channel occupies a 20 MHz frequency range.
- However, due to overlap, only three non-overlapping channels (1, 6, and 11) are recommended for use to minimize interference.
- Example channels: Channel 1, Channel 6, and Channel 11.
- Note: Microwaves, cordless phones, and other devices also operate in this frequency range, potentially causing interference.
- 5 GHz Channels:
- The 5 GHz band offers more channels and less interference.
- Channels are spaced 20 MHz apart, but they can be combined for wider bandwidth (e.g., 40 MHz or 80 MHz).
- The exact number of available channels depends on your router and regulatory domain.
- Example channels: 36, 44, 149, 161, etc.
- Note: 5 GHz signals have shorter range but higher data rates.
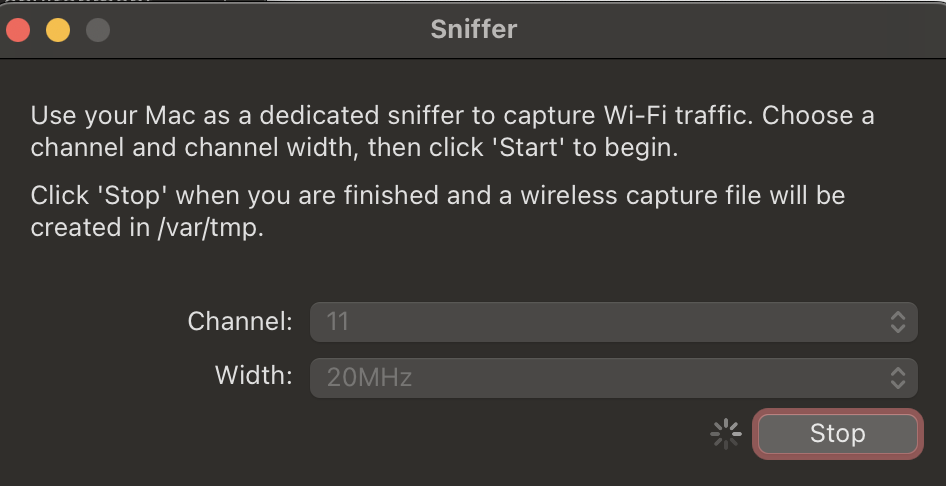
Make your selection and start scanning. Not much will happen and the circle will spin on the dialog window. Click ‘Stop’.
One thing to be wary of is the files collect quickly and depending on how long they ran they can become quite large. You need to be mindful of how much storage you have available on your device before beginning to collect.
The scans will save as a pcap file in /var/tmp. If you are not familiar with the Linux operating system this can be confusing; where do I find that file? First, open Finder. Then click command+shift+G. Enter /var/tmp to access the pcap file that was just created from the /var/tmp directory. You can copy it wherever you would like to make access easier.
View the PCAP File
The file extension is pcap. PCAP (Packet Capture) is an essential method for network traffic analysis. Let’s break it down:
- Definition: PCAP involves capturing and analyzing network traffic data. It captures packets of data as they traverse a network interface and stores them in a file format known as PCAP or pcapng.
- Basic Packet Information:
- Source and Destination Addresses: PCAP files record intercepted or captured network packets, including details like source and destination addresses.
- Timestamp: Each packet’s timestamp indicates when it was captured.
- Protocol: It specifies the communication protocol used (e.g., TCP, UDP).
- Payload: The actual data being transmitted within the packet.
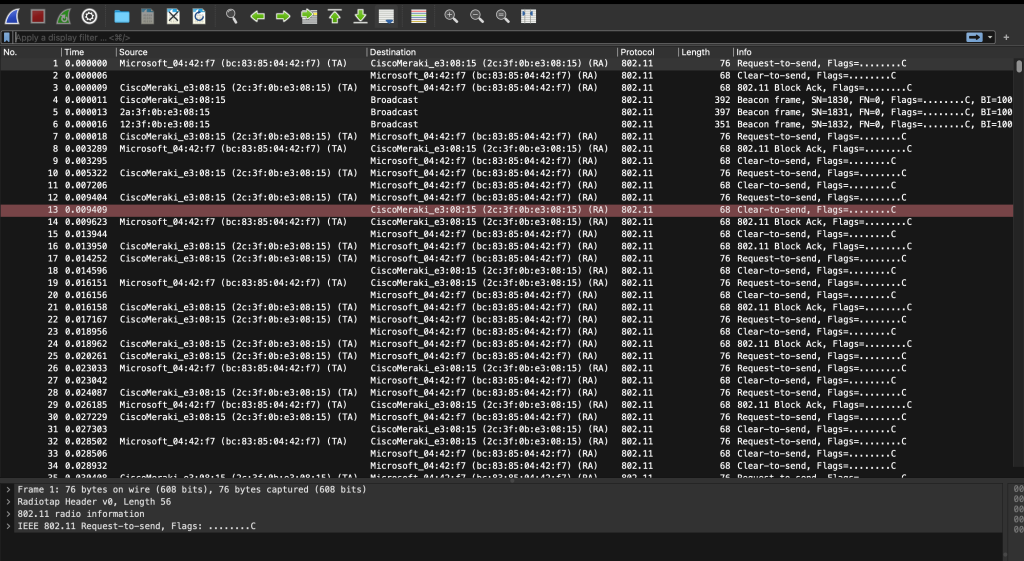
To view PCAP you will need a tool. The most common tool is Wireshark (https://www.wireshark.org). You can download and install the tool. Once installed, you can open the PCAP file from within Wireshark. You will see a screen similar to the following. You can see what devices are connected and the details of the packets that are being sent over the network. Consult a tutorial on PCAP to really understand what you have!
Conclusion
So far for my project, I have collected data at a local coffee shop, from my apartment, from a public library, from an office, and Canisius. Sometimes collections are sparse; there are just not many wireless devices connected to public networks. I am plan to do coffee shop locations that are in heavily populated ares in hopes of more people being on a network. If you do a lot of air travel, an airport is a location with lots of wireless traffic.
The next step I will be taking with my project is utilizing Scrapy to get a deeper analysis of the packets.